运用Storyboard在不同页面之间跳转及传值
转载请注明出处,不胜感激!
在iOS开发中,我们常常会遇到一种应用场景就是需要在页面之间跳转以及传值。
其实,在Storyboard中可以用两种方式进行页面的跳转,第一种是通过建立Segue的方式,第二种是通过NavigationController的方式跳转。下面我们来看看如何通过这两种方式跳转以及传值,假设我们的场景如下,能够点击第一个页面中的Button按钮可以跳转到第二个页面,同时将第一个页面输入的值传递给第二个页面。

一、以Segue方式跳转页面及传值
我们先以Segue的方式来讲解,首先我们新建一个SingleView Application,拖出两个View后,在第一个页面上拖入text Field和Button控件,在第二个页面上放入一个Label控件。然后选中第一视图页面,按住Control拖拽到第二页面视图,在跳出来的Segue模式选项里我们选择以Push的方式跳转,这样我们就已经初步将两个视图页面关联在一起了。

接下来,我们要把第一个页面视图中text Field框内的值传入到第二个页面视图中。我们先选中第一个页面视图并把Custom Class绑定为我们的ViewController类。当然我们也要为第二个页面视图也绑定为一个类,先新建一个Cocoa Touch Class类型文件,Class名称设定为SecondViewController,以及Subclass of选择为UIViewController,新建完成后,把第二个页面视图的自定义类绑定为刚才我们新建的SecondViewController类。

接下来,我们在SecondeViewController类文件里给第二个页面视图的Label绑定一个Outlet关联。另外,因为我们需要传值所以我们还要定义一个变量属性,利用这个变量属性来传值,之后在viewDidLoad()方法里,我们把变量赋值给我们的Label控件,代码大致如下:
import UIKit

class SecondViewController: UIViewController {

    @IBOutlet var Label1: UILabel!
    var pageValue: String = ""

    override func viewDidLoad() {
        super.viewDidLoad()

        // Do any additional setup after loading the view.
        Label1.text = "首页传入的值为:\(pageValue)"
    }

    override func didReceiveMemoryWarning() {
        super.didReceiveMemoryWarning()
        // Dispose of any resources that can be recreated.
    }
}
然后,让我们切换到第一个视图页面中,打开ViewController类文件,我们要为text Filed控件做一个Outlet关联,因为我们是通过在此输入框里输入内容传递的。
@IBOutlet var pageText: UITextField!
接下来,我们要开始真正的传值部分,在我们的程序中有很多个Segue,所以我们还需要为指定的Segue设定一个标示符,选中我们之前在两个页面视图之间创建出来的Segue,然后在右侧Attributes Inspector栏中找到Identifier并将它设定为SecondView,稍后我们会用这个我们指定的这个Segue来进行判断传值。

因为我们使用的是Segue的方式进行跳转,所以我们这里使用 一个prepareForSegue方法来帮助我们处理传值的任务,默认情况下,该方法不会做任何事情,所以我们要override重新覆盖这个方法来进行传值处理。我们先用segue.indetifier去判断我们指定的Segue标示符是否与我们预期的一致。如果一致,我们就用segue.destionationViewController去检索目标页面视图,并将得到的对象赋值给destinationController变量,此时,destinationController变量就是我们的第二个页面视图对象了,我们就可以很轻松的用destinationController.pageValue的方式给第二个页面视图里我们定义的变量属性进行传值了。
override func prepareForSegue(segue: UIStoryboardSegue, sender: AnyObject?) {
       if segue.identifier == "SecondView" {
            let destinationController = segue.destinationViewController as! SecondViewController
            destinationController.pageValue = self.pageText.text
        }
    }
ViewController类文件里的代码大致如下:
import UIKit

class ViewController: UIViewController {

    @IBOutlet var pageText: UITextField!

    override func viewDidLoad() {
        super.viewDidLoad()
        // Do any additional setup after loading the view, typically from a nib.
    }

    override func didReceiveMemoryWarning() {
        super.didReceiveMemoryWarning()
        // Dispose of any resources that can be recreated.
    }

    @IBAction func btm(sender: AnyObject) {
        performSegueWithIdentifier("SecondView", sender: self)
    }

    override func prepareForSegue(segue: UIStoryboardSegue, sender: AnyObject?) {
        if segue.identifier == "SecondView" {
            let destinationController = segue.destinationViewController as! SecondViewController
            destinationController.pageValue = pageText.text
        }
    }
}
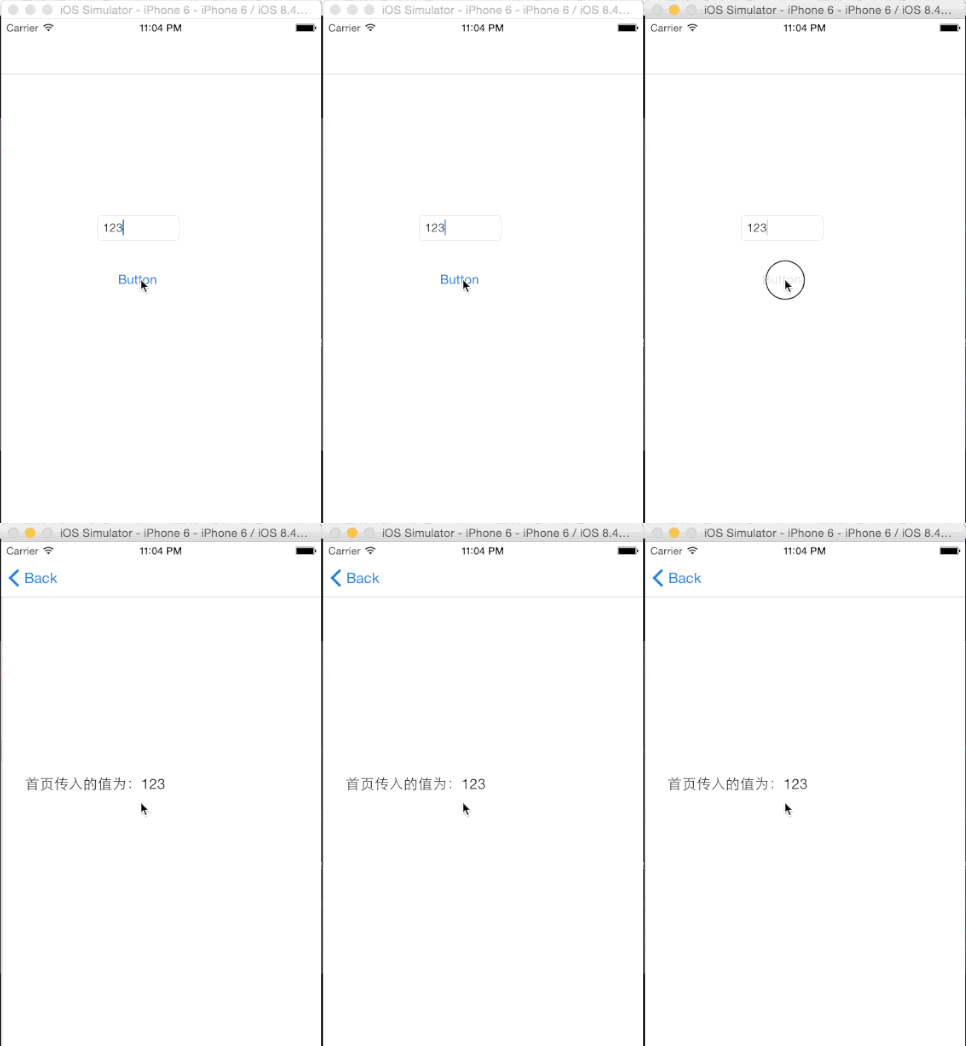
让我们看看效果

二、以NavigationController的方式进行跳转和传值
NavigationController的方式是极为简单的,既然是以这种方式我们就不需要segue了,所以我们把之前两个页面视图的Segue删除掉,然后选中第二个页面视图,在右侧Identity Inspector面板栏中找到Storyboard ID,设定一个自定义标示符ViewController2。

接着回到我们的ViewController类文件中,删除prepareForSegue方法,我们这里instantiateViewControllerWithIdentifier来实例化我们指定的目标页面视图对象,在获得目标页面视图后,我们依然变量属性赋值,最后用navigationController.pushViewController方法来跳转到这个目标页面视图。
import UIKit

class ViewController: UIViewController {

    @IBOutlet var pageText: UITextField!

    override func viewDidLoad() {
        super.viewDidLoad()
        // Do any additional setup after loading the view, typically from a nib.
    }

    override func didReceiveMemoryWarning() {
        super.didReceiveMemoryWarning()
        // Dispose of any resources that can be recreated.
    }

    @IBAction func btm(sender: AnyObject) {
        //获取目标页面视图对象
        let destinationController = self.storyboard?.instantiateViewControllerWithIdentifier("ViewController2") as! SecondViewController

        //页面传值
        destinationController.pageValue = pageText.text

        //用navigationController方法跳转到指定页面视图
        self.navigationController?.pushViewController(destinationController, animated: true)
    }
}
好了,就是这样。